This is a guest post by Nikki of Reef’d Up Aquatics.
In project management, there’s the “you can have it cheap, fast, or good, and if you’re lucky, you can pick two” concept. When I decided to try a saltwater aquarium, I happened to come across a 40 gallon aquarium at a yard sale…for free! My first thought was, “Yay, the expensive part is over!” I was wrong…dead wrong. I knew I had to find a way to keep costs down or get out of the hobby.
It seems that more people are requesting freebies on various reef keeping forums. If you’re someone who underestimated the expense of keeping a reef or how life would take a turn, then this article is for you. If you haven’t started an aquarium and envision yourself having a world-renown tank, realize that many high-end systems cost approximately $100/gallon by the time they are complete (in other words, keep your expectations reasonable).
General
Local classified listings are always a great place to start. Also, I always stress the importance of local clubs to aquarists, including paying regular dues. Most clubs offer raffles to their members, local fish store discounts (often 10%), member-to-member discounts, group buys, and even host “frag swaps” (where members and vendors sell livestock and equipment). A $10 payment for dues usually meant about $250 in benefits back to me (each club varies).
Do It Yourself
If you can’t find exactly what you want or need in the time you have at the right price, then make it yourself! There’s a DIY project for just about everything reef keeping related. However, keep your ability and material costs in mind. You may otherwise end up paying more than the project would have originally cost.
Lighting
DIY metal halide, T-5, and LED instructions are readily available. Consider the tradeoffs of each when choosing a system. Metal halide equipment is fairly inexpensive, but power consumption is through the roof. T-5 light equipment and power consumption isn’t terribly expensive, but regularly changing multiple bulbs can be pricey. LEDs have come down in price, but they’re still high. However, power costs are almost negligible.
Tanks
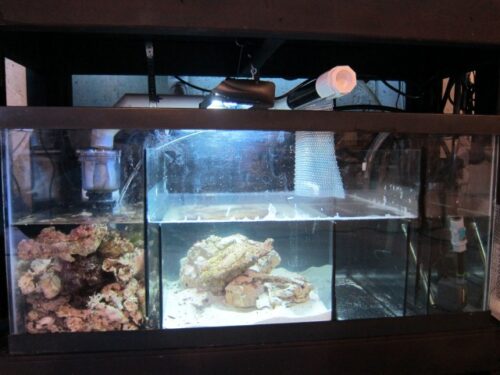
DIY acrylic tanks are lightweight, are less expensive than professionally-made, but they require expensive equipment. Acrylic sheet cost varies due to gas prices, so try to purchase when gas prices have gone down (good luck on that). To do a good job, a table saw with a special acrylic saw blade is needed. Other supplies like right angles, tons of large clamps, syringes, solvents, cement, etc. are required. Basically, do your homework first, or else you may end up with a bowing acrylic tank threatening to break. Glass tanks are doable as well, but the cost savings aren’t as great since glass is more difficult to work. Plywood epoxy tanks with acrylic faces are unique, but for small tanks, they are not cost effective as the epoxy paint is very expensive. At a minimum, sumps/refugiums are usually very easy to make at home and cost much less than a professionally made sump/refugium.
DIY glass sump
Stands
Obviously, a stand made of 2×4 boards and plywood may work, but it also probably won’t look the best. However, handmade stands may end up costing as much as a professionally-made stand. Look for used stands.
Rock/Sand
Sand is often free from people tearing down their tanks (but requires a good washing), and rock is usually lower than retail. I prefer to purchase dry rock and sand as it is less expensive than live rock/sand and is free of pests. I then seed it with a couple pounds live rock. Here in Utah, the more adventurous reef keepers have found Lake Bonneville tufa rock (LBTR) and oolitic sand out in the desert. Check with your local club as other areas may have quarries that pull out rock suitable for use. Live rock can also be made with Portland cement, sand, and water. However, the rocks will leach for quite a while and will require more time to cycle. I’ve even seen concrete blocks used (not the most aesthetically pleasing look though.)
Water
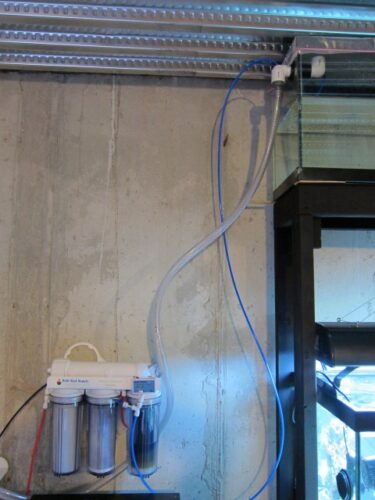
This is not the place to skimp. Treated tap water can cause issues down the road that will eventually run costs up. In my opinion, drop the cash on a four-stage 75 gallons per day reverse osmosis de-ionizing system (RO/DI), which includes a sediment filter, carbon filter, membrane, and DI resin. My system with a dual inline total dissolved solids (TDS) meter and pressure gauge was about $150. Comparatively, many local fish stores charge $0.50-$1.00 per gallon of RO/DI water. Depending on tank size, an RO/DI system may pay off very quickly (and if your significant other is still not convinced, tell him or her about how delicious and healthy the water will be!) A TDS meter and pressure gauge will help determine when the filters need to be changed, thus helping you extend their life instead of changing them needlessly. Also, DI resin can be recharged indefinitely using common household chemicals.
My RO/DI System
Skimmers
Just about everyone I’ve known to try to make a DIY skimmer has ended up spending approximately the same as if they had purchased a professionally-made skimmer. With a low bioload and plenty of other filtration (live rock, filter socks, etc), a skimmer may not even be necessary. Also, Feldman et. al. research in 2009-2010 (published in Advanced Aquarist) determined skimmer price did not reflect skimmer performance (“bubbles is bubbles”).
What ways have you found to keep costs down?


I have found that by simply reading the internet for various answers also helps. Don’t take the first advice you receive. Your local fish store may be in to make a buck or two off of a tank and equipment they sell you.
Also keep in mind that algae is a battle for most people. Keeping it at bay is every aquarists goal. Algae comes and goes the best way for it to stop being a problem is to have a place for it to thrive somewhere else in your system without it becoming too abundant in your display tank.